


Tired of budgets that die after a month?
Most fail because they’re too complex or need constant tracking.
You want something quick to set up, easy to follow, and that actually shows progress.
The best starter options are 50/30/20 for steady paychecks, zero-based if your income jumps around, and the envelope system if you tend to overspend in certain categories.
Pick the one that matches your pay pattern and biggest spending weak spot, commit to it for three months, and then tweak.
Quick Overview of Beginner-Friendly Budgeting Approaches
A beginner budget works when you can set it up fast, stick to it without burning out, and actually see progress. Simple rules, minimal tracking, no financial jargon that makes your head spin. The best starter budgets cover your essentials first, then build in a little breathing room for everything else.
The three most common beginner methods are the 50/30/20 rule (split your income into three buckets), zero-based budgeting (give every dollar a job), and the envelope system (use physical or digital cash limits for specific categories). Each one tackles the same problem. Making sure you don’t spend more than you earn. But they do it in different ways. The 50/30/20 rule is fastest to set up. Zero-based budgeting gives you the most control. The envelope system works best if you need a hard stop on spending in certain areas.
Choosing the right one depends on your lifestyle and income pattern. If you get paid the same amount every two weeks and you’re comfortable tracking on your phone, start with 50/30/20 or Pay-Yourself-First. If your income bounces around (freelance, tips, gig work), zero-based budgeting with a buffer helps you stay stable. If you tend to overspend on takeout or online shopping, envelopes force you to stick to limits.
Here’s what every beginner budget needs to include:
Calculate your actual take-home income after taxes and deductions. Separate expenses into fixed costs (rent, insurance) and variable costs (groceries, gas). Pick one method and commit to it for at least three months. Run a quick monthly check to adjust categories and track progress.
Understanding the 50/30/20 Budgeting Method

The 50/30/20 rule splits your take-home pay into three simple buckets. 50% for needs, 30% for wants, and 20% for savings or debt payments. It’s one of the easiest methods to start because you don’t have to track every single dollar or create a dozen spending categories. You just need to know your net income and be able to sort your expenses into three groups.
Here’s how the math works in real life. If you bring home $2,500 a month, you’d put $1,250 toward needs (rent, utilities, groceries, insurance, minimum loan payments), $750 toward wants (eating out, entertainment, subscriptions, hobbies), and $500 toward savings or extra debt payments. On $3,500 a month, that’s $1,750 needs, $1,050 wants, $700 savings. On $6,000 a month, it’s $3,000 needs, $1,800 wants, $1,200 savings. The percentages stay the same, but the dollar amounts scale with your income.
To get the 50/30/20 method running, follow these five steps:
Calculate your net monthly income. Use your actual take-home pay after taxes, retirement contributions, and health insurance premiums are deducted. If your income varies, use the lowest amount you’ve earned in the past three months.
List all your needs. Include rent or mortgage, utilities, groceries, transportation, insurance, minimum debt payments, and basic phone service. Add up the total.
List all your wants. Cover dining out, streaming services, gym memberships, shopping, entertainment, travel, and anything that isn’t required to survive or work.
Assign percentages and check your math. Multiply your net income by 0.50, 0.30, and 0.20. Compare those targets to your actual spending in each category.
Track your spending for one month and adjust. If your needs are over 50%, look for ways to cut fixed costs (cheaper phone plan, refinance insurance). If wants are high, trim subscriptions or reduce restaurant spending.
| Monthly Net Income | Needs (50%) | Wants (30%) | Savings/Debt (20%) |
|---|---|---|---|
| $2,500 | $1,250 | $750 | $500 |
| $3,500 | $1,750 | $1,050 | $700 |
| $6,000 | $3,000 | $1,800 | $1,200 |
The Envelope Budgeting System for Total Spending Control

Envelope budgeting assigns a specific dollar amount to each spending category, then stops you from spending more once the money runs out. You can use physical cash in labeled envelopes or digital “envelopes” in an app. This method works best for people who struggle with variable spending, categories like groceries, gas, eating out, or entertainment where it’s easy to lose track.
Here’s a real example for someone bringing home $2,500 a month. Start by covering your fixed expenses. Rent $900, Car Payment $200, Insurance $100, Phone $50. That’s $1,250 in fixed costs. Then create envelopes for your variable spending. Groceries $300, Gas $150, Eating Out $100, Fun Money $50, Personal Care $50. That’s $650 in envelopes. The remaining $600 goes to savings, emergency fund, or extra debt payments, categories you don’t spend from during the month.
The power of envelopes is simple. When the envelope is empty, you stop spending in that category. If you blow through your $100 restaurant budget by the 15th, you eat at home for the rest of the month. If you have $20 left in your grocery envelope with three days to go, you get creative with what’s in the pantry. It’s a hard limit that removes the temptation to justify “just one more” purchase.
Here’s how to set up and run an envelope system in six steps:
Choose your envelope categories. Focus on the spending areas where you tend to overspend or lose track. Common choices are groceries, gas, restaurants, entertainment, clothing, personal spending.
Decide how much goes in each envelope. Review your last two months of spending to set realistic starting amounts. If you spent an average of $450 on groceries, try starting with $400 and see if you can make it work.
Withdraw cash or set up digital envelopes. If using cash, withdraw the total amount on payday and divide it into labeled envelopes. If using an app like Goodbudget, create virtual envelopes and assign your amounts.
Spend only from the designated envelope. When you buy groceries, take money from the grocery envelope. When you grab coffee, use the restaurant or personal spending envelope.
Track what’s left as you go. Write the remaining balance on the envelope after each purchase, or check your app daily to see where you stand.
Replenish envelopes each pay period. On your next payday, refill each envelope to its starting amount. If you have money left over in an envelope, you can roll it into savings or next month’s budget.
Zero-Based Budgeting for Maximum Control

Zero-based budgeting means every single dollar of your income gets assigned a job before the month starts. Income minus all your planned expenses and savings should equal zero. It doesn’t mean you spend everything. It means you decide in advance where every dollar goes, including the money you’re saving or using to pay down debt.
Here’s what a zero-based budget looks like for someone earning $3,500 net per month. Rent $1,200, Utilities $150, Groceries $400, Transportation (gas, parking) $150, Car Insurance $100, Debt Payment $400, Emergency Savings $300, Entertainment $150, Miscellaneous $150. Add those up and you get exactly $3,500. Every dollar has a name. If you get a $100 bonus or side hustle payment, you immediately assign it. Maybe $50 to savings and $50 to your debt payment. Nothing sits unassigned.
This method takes more time upfront, usually 30 to 60 minutes each month to build and adjust your budget. But it’s the most precise way to control spending, prioritize goals, and make sure you’re not leaking money into categories you don’t care about. It works best when you have specific targets, like paying off a credit card, building an emergency fund to $5,000, or saving for a down payment.
Tools for Zero-Based Budgets
YNAB (You Need A Budget) is the most popular app designed specifically for zero-based budgeting. It costs about $14.99 a month or $99 a year, and it walks you through assigning every dollar. If you prefer free tools, Google Sheets or Excel work just as well. You just have to build the structure yourself. Set up columns for category, budgeted amount, actual spending, and the difference. Update it weekly or after every purchase.
Here’s how to create and maintain a zero-based budget in seven steps:
Calculate your total net income for the month. Include your regular paycheck, side income, freelance payments, and any other money coming in. If income varies, use your lowest recent month as the baseline.
List all your fixed expenses first. Write down rent or mortgage, utilities, insurance, loan minimums, phone bill, internet, and any other bills that stay the same each month.
Estimate your variable expenses. Add categories for groceries, gas, personal spending, entertainment, dining out, clothing, and household items. Use your past spending as a starting point.
Assign dollars to savings and debt goals. Create line items for emergency fund contributions, extra debt payments, retirement savings, and any sinking funds (vacation, car repairs, holiday gifts).
Subtract all expenses and savings from your income. The goal is to reach exactly zero. If you’re over, cut back on variable categories or reduce savings temporarily. If you’re under, assign the extra to savings or debt.
Track every transaction throughout the month. Log purchases daily or weekly. Compare actual spending to your budgeted amounts and adjust categories as needed.
Review and reset the budget before each new month. Income and expenses shift month to month. Create a fresh zero-based budget every 30 days to account for irregular costs like birthdays, car registration, or annual subscriptions.
Pay-Yourself-First: Automated Savings for Beginners
Pay-Yourself-First flips the normal budgeting process. Instead of saving whatever is left at the end of the month, you automatically move money into savings the moment you get paid. The rest of your income covers bills and spending. This method works because it removes the decision. Saving happens before you have a chance to spend the money.
Start by picking a realistic savings amount, somewhere between 5% and 20% of your net income. On $3,000 a month, 10% is $300. Set up an automatic transfer from your checking account to a separate savings account for $150 on each payday if you’re paid biweekly. That’s $600 a month in savings without thinking about it. If $300 feels too aggressive, start with $100 or even $50. The goal is to build the habit, not to save a perfect amount right away.
Here’s what to prioritize when using Pay-Yourself-First:
Emergency fund target. 3 to 6 months of expenses. If your rent, utilities, groceries, and transportation add up to $2,000 a month, aim for $6,000 to $12,000 in your emergency fund. Start with a smaller goal like $500 or $1,000, then build from there.
High-yield savings account. Keep your emergency savings separate from your everyday checking account. Use a high-yield savings account that earns interest (typically 4% to 5% as of 2024) but is still easy to access if you need it.
Automate on payday. Set the transfer date to match when you get paid. If you’re paid on the 1st and 15th, schedule transfers for those same days so the money moves before you see it.
Increase savings every 3 months by 1%. Once you’re comfortable with your current savings rate, raise it slightly. If you’re saving 10% of $4,000 (that’s $400), increasing by 1% adds another $40 a month. Small bumps add up over time.
Choosing the Best Budgeting Method for Your Situation

The right budgeting method depends on how steady your income is, how much control you need, and whether you prefer digital tracking or physical systems. Someone with irregular freelance income needs a different approach than someone with a fixed salary and automatic bills. The goal is to match the method to your life, not force yourself into a system that creates more stress.
If your income fluctuates week to week (gig work, tips, commission, seasonal jobs), zero-based budgeting with a buffer works best. Build a small reserve (one month of expenses if possible) and use it to smooth out the ups and downs. Every time money comes in, assign it immediately to categories until your budget is fully funded for the month. For lower, stable income under $3,000 net, combine Pay-Yourself-First with envelope budgeting. Automate a small, fixed savings amount like $50 or $100 per paycheck, then use envelopes for your variable spending to keep tight control on groceries, gas, and discretionary categories.
| Income Type | Recommended Method | Why It Fits | Example Allocation |
|---|---|---|---|
| Irregular (freelance, tips, gig work) | Zero-based with buffer | Lets you assign dollars as they arrive and maintain stability with a reserve month | $3,200 income: $1,200 rent, $400 groceries, $300 buffer, $500 savings, rest to variables |
| Low, stable income (under $3,000 net) | Pay-Yourself-First + envelope | Automates a small savings amount and controls overspending in key categories | $2,500 income: $100 auto-save, $900 rent, $300 groceries, $150 gas, envelopes for rest |
| Mid income ($3,000–$6,000 net) | 50/30/20 or zero-based | 50/30/20 is simple and low-maintenance; zero-based offers precision for debt or goal focus | $4,000 income: 50/30/20 = $2,000 needs, $1,200 wants, $800 savings |
| High income (over $6,000 net) | Zero-based + sinking funds | Maximizes control and allows targeted savings for taxes, retirement, and large goals | $7,000 income: all essentials covered, $1,000 retirement, $800 sinking funds, $500 buffer |
Sinking Funds, Emergency Funds, and Savings Categories for Beginners
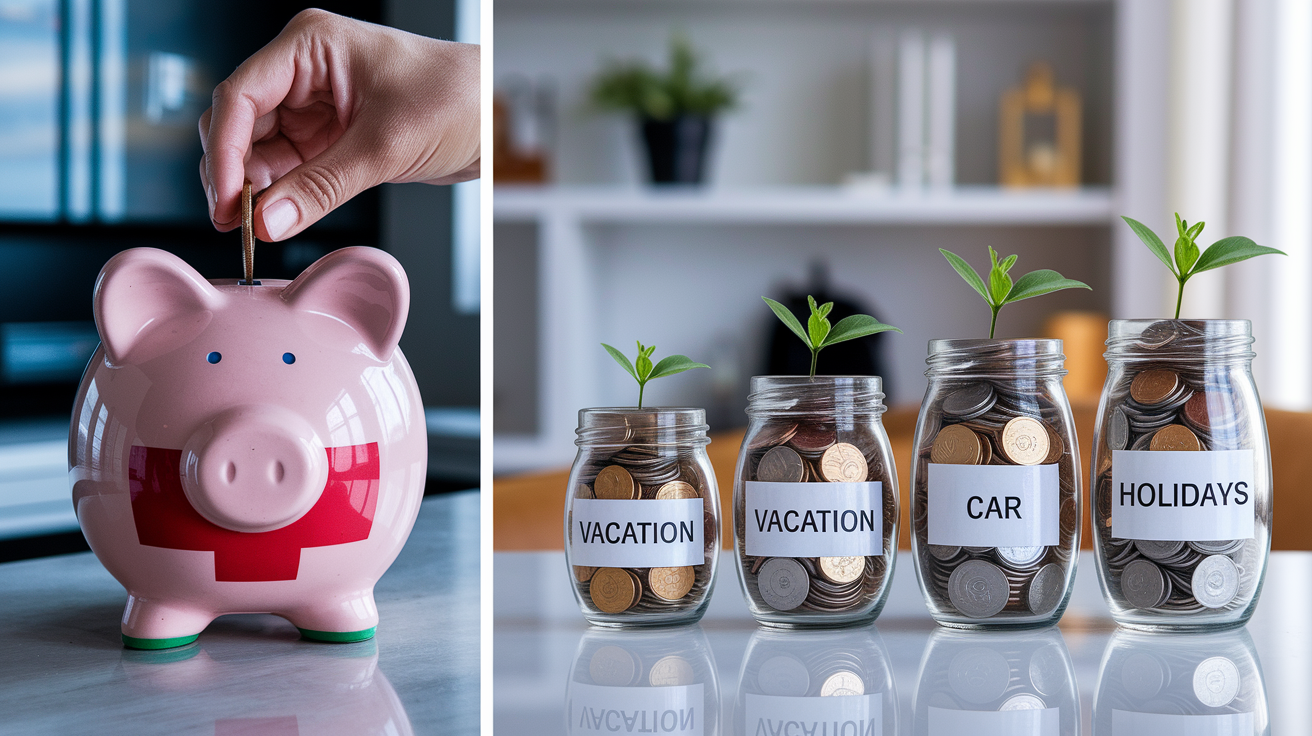
A sinking fund is a savings category for a specific expense you know is coming. Instead of scrambling when the bill arrives, you save a little each month so the money is already there. If you want to take a $1,200 vacation in four months, set aside $300 a month starting now. By the time you book the trip, the money is sitting in your account ready to go.
An emergency fund is different. It covers unexpected costs like a car repair, medical bill, or sudden job loss. The standard target is 3 to 6 months of essential expenses. If your rent, utilities, groceries, insurance, and minimum loan payments add up to $2,000 a month, aim for $6,000 to $12,000. If your job or income is less stable (contract work, commission, seasonal), lean toward 6 months. If you have a steady salary and low expenses, 3 months is a reasonable starting goal.
Both sinking funds and emergency savings fit into any budgeting method. In a 50/30/20 budget, they’re part of your 20% savings bucket. In zero-based budgeting, they get their own line items with specific monthly contributions. In envelope budgeting, you create separate envelopes (physical or digital) and add money each pay period. Pay-Yourself-First handles emergency savings automatically, and you can layer sinking funds on top once your emergency buffer is solid.
Common sinking fund categories for beginners:
Car repairs and maintenance. Save $50 to $100 a month so a $600 brake job doesn’t blow up your budget.
Birthdays and holidays. If you spend about $800 on gifts throughout the year, save $65 a month.
Medical and dental costs. Set aside money for copays, prescriptions, and annual checkups if your insurance has high deductibles.
Home maintenance or renter’s insurance deductible. Even renters need a buffer for replacing stolen items or covering a deductible after a break-in.
Annual subscriptions or fees. Car registration, software renewals, Amazon Prime, Costco membership. Anything that hits once a year.
Tools, Templates, and Apps for Beginner Budgets

Apps and spreadsheets both work, but they solve different problems. Apps connect to your bank, auto-import transactions, and send you alerts when you’re close to a spending limit. Spreadsheets give you full control, no subscription fees, and no concerns about linking your accounts. If you’re comfortable with tech and want automation, use an app. If you prefer privacy and don’t mind manual entry, use a spreadsheet.
Here’s what the most popular beginner tools cost and what they do. Mint is free and tracks spending across multiple accounts, but it focuses more on monitoring than active budgeting. YNAB costs about $14.99 a month or $99 a year and teaches zero-based budgeting with real-time sync and goal tracking. It’s the best option if you want built-in education and accountability. Goodbudget is freemium and designed for envelope budgeting. The free version covers 10 envelopes, and paid tiers unlock more. EveryDollar offers a free version for manual entry and a paid tier (around $79.99 a year) that syncs with your bank. Google Sheets is completely free and works on any device. Excel requires a Microsoft 365 subscription (about $6.99 a month or $69.99 a year for personal use), but it includes advanced templates and better formula tools.
When linking bank accounts, make sure the app uses bank-level encryption and two-factor authentication. Most major budgeting apps (YNAB, Mint, EveryDollar) connect through Plaid, a secure third-party service that never stores your login credentials. Still, if you’re not comfortable linking accounts, use the manual-entry version or stick with spreadsheets.
Recommended Templates
Google Sheets templates should include columns for category, budgeted amount, actual amount, difference, and notes. Add a summary row at the top that shows total income, total budgeted, total spent, and remaining balance. Use conditional formatting to highlight categories where actual spending exceeds the budget. Excel templates can include the same structure but with built-in pivot tables and charts for deeper analysis.
Visual aids that make budgeting easier to understand and stick to:
Pie chart of spending by category. Shows at a glance where your money actually goes each month. Useful for spotting categories that eat up more than expected.
Envelope labels with dollar amounts. Print or write category names and starting balances on physical envelopes. Digital envelope apps show the same info in a list.
Stacked bar chart tracking monthly savings growth. One bar per month, split into emergency fund, debt payoff, and other savings goals. Makes progress visible.
Monthly bill calendar. Mark due dates for rent, utilities, credit cards, and subscriptions so you never miss a payment or overdraft.
Category tracker with green/yellow/red indicators. Green when under budget, yellow when within 10% of limit, red when over. Helps you course-correct mid-month.
Reconciliation sheet. Compare budgeted vs actual at month-end. Track patterns over 3 to 6 months to refine future budgets.
Common Beginner Budgeting Mistakes and How to Avoid Them

Most budgets fail in the first two months because people set them up wrong, not because budgeting doesn’t work. The mistakes are predictable. Unrealistic targets, too many categories, ignoring small recurring costs, and expecting perfection from day one. If you know what trips people up, you can avoid it.
The biggest mistake is not tracking variable spending at all. You estimate $400 for groceries, but you never check receipts or your bank app, so you have no idea if you’re actually spending $400 or $550. Fix this by tracking daily or weekly for the first month, then adjust your budget by 10% to 30% based on reality. If you spent $520 on groceries, budget $500 next month and aim to bring it down slowly. Another common problem is skipping the emergency fund and jumping straight to big goals like a vacation or new furniture. Start with a $500 to $1,000 starter buffer before anything else. That small cushion keeps one car repair or medical bill from derailing everything.
Six mistakes beginners make and how to fix them:
Not tracking spending consistently. Pick one method (app, spreadsheet, or even a pocket notebook) and log every purchase within 24 hours. Set a daily phone reminder if needed.
Creating too many categories. Start with 8 to 12 categories max. Combine similar expenses (lump streaming services, internet, and phone into “subscriptions”) and add detail later if needed.
Ignoring subscription creep. Pull up your bank and credit card statements, highlight every recurring charge, and cancel anything you don’t actively use. Even $10 a month adds up to $120 a year.
No buffer for unexpected expenses. Keep $100 to $300 unassigned in your checking account as a small cushion, or build it into your budget as a “miscellaneous” line item.
Setting unrealistic goals too fast. If your current spending is $3,200 and your income is $3,000, don’t try to cut $500 in month one. Aim for $100 to $200 in reductions and build from there.
Skipping the monthly review. Block 30 minutes at the end of each month to compare budgeted vs actual, adjust next month’s numbers, and celebrate small wins like staying under budget in two categories.
A 7-Day Quick-Start Plan for New Budgeters
You don’t need a month of planning to start budgeting. You can get the foundation in place in seven days, then refine as you go. The goal this week is to calculate your real income, figure out where your money currently goes, pick one method, and set up at least one automatic action that moves you forward.
Here’s what to do each day:
Day 1: Calculate your net monthly income and gather statements. Pull up your last paycheck stub and write down your take-home pay after taxes, retirement contributions, and insurance. If you’re paid biweekly, multiply one paycheck by 26 and divide by 12 to get your average monthly income. Then log into your bank and download the last two to three months of checking and credit card statements.
Day 2: Categorize your expenses into fixed and variable. Go through your statements and highlight every recurring bill (rent, car payment, insurance, phone, utilities). Add those up. That’s your fixed monthly cost. Then group everything else into variable categories: groceries, gas, dining out, entertainment, shopping, personal care. Write down rough totals for each.
Day 3: Pick a budgeting method. Based on your income stability and spending patterns, choose one. 50/30/20 if you want simplicity and your needs are under 50% of income. Envelope system if you overspend in specific categories like restaurants or shopping. Zero-based if you want maximum control and have debt or savings goals. Pay-Yourself-First if you just need to automate savings and keep the rest loose.
Day 4: Set up at least one automatic transfer. Open a separate savings account if you don’t have one. Schedule an automatic transfer of $100 to $300 (or whatever feels doable) to move from checking to savings on every payday. If you’re using Pay-Yourself-First, this is your core action. If you’re using another method, it’s your emergency fund or sinking fund starter.
Day 5: Track every purchase for one day. Write down or log every dollar you spend today. Coffee, lunch, gas, groceries, subscription charge, everything. This builds the habit of noticing where money goes. If using an app, connect your accounts and review the imported transactions.
Day 6: Find and cancel one unnecessary subscription or service. Look at your recurring charges and cut at least one thing you don’t use regularly. Gym membership you haven’t visited in two months, streaming service you forgot about, app subscription you signed up for on a free trial. Cancel it and add that monthly cost back into your budget as extra savings or debt payment.
Day 7: Run your first weekly budget check and set a small reward. Compare your planned budget to actual spending so far. Adjust any categories that are clearly off. Then pick a small, free or cheap reward for sticking with the plan this week. Maybe a homemade treat, an hour of guilt-free gaming, or a walk in a place you enjoy. Budgeting works better when you acknowledge progress, even tiny progress.
Final Words
Start small. We covered simple, repeatable budgets, the 50/30/20 split, envelope cash control, zero-based detail, and pay-yourself-first automation.
We also walked through sinking funds, practical tools, common mistakes, and a seven-day quick-start you can use this week.
Pick one method that fits your income, set one automated transfer, and run the plan for three months. If you need a rule, choose the best budgeting method for beginners that reduces stress and helps you save. You’ve got this.
FAQ
Q: What is the easiest budgeting method?
A: The easiest budgeting method is the 50/30/20 rule, which splits net income into 50% needs, 30% wants, and 20% savings/debt — try it one month and tweak categories to fit your bills.
Q: What is the 50 30 20 budget rule?
A: The 50/30/20 budget rule allocates 50% to needs, 30% to wants, and 20% to savings or debt. For example, on $3,000 net that’s $1,500, $900, and $600 respectively.
Q: How to save $10,000 in 3 months?
A: Saving $10,000 in 3 months requires about $3,333 per month, aggressive cuts, and extra income. Boost earnings, cut non-essentials, sell items, and set automatic transfers to a dedicated account.
Q: How should a beginner start a budget?
A: A beginner should start a budget by calculating net income, listing fixed and variable expenses, then choosing a simple method like 50/30/20 or pay-yourself-first. First step: set one automatic savings transfer.